How to Clean a Portable Air Conditioner’s Coils, Step by Step
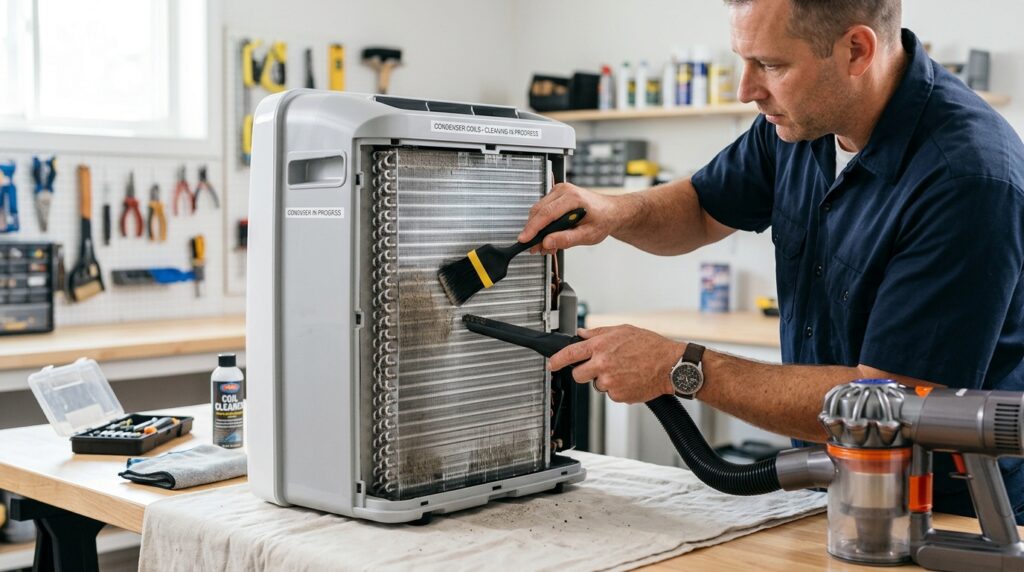
Unplug the unit at the wall. Not switched off — unplugged. Every time, before anything.
Do not remove the outer casing. Clean only what you can reach through the panels your manual identifies. Behind the casing are mains electrical components and a sealed refrigerant circuit — and most modern units contain R290, refrigerant-grade propane, classed A3 for flammability. Puncturing a coil is not a repairable mistake. If the dirt is somewhere you can only reach by dismantling the unit, that’s a job for a qualified engineer, not an afternoon.
Never spray liquid toward the fan motor, control board, or any wiring.
Here’s the honest scope: on a portable unit you can meaningfully clean the filter and the accessible face of the evaporator coil, and that’s usually enough. The filter does most of the work — if it’s been cleaned regularly, the coil behind it stays reasonably clear. A soft brush, a vacuum with a brush attachment and a light touch handle it. The fins are thin aluminium, they bend if you push, and bent fins restrict airflow permanently. Gentle beats thorough here.
Coil cleaning gets recommended a lot and explained badly. Here’s what’s actually achievable without taking the machine apart.
What the coils do
A portable unit has two heat exchangers:
- The evaporator coil — the cold one, behind the filter, that room air passes over. This is where moisture condenses out, and it’s the one you can partly reach.
- The condenser coil — the hot one, which rejects heat into the exhaust air. Usually deeper inside and largely inaccessible on a portable unit.
Dust on the evaporator restricts airflow, so less heat is removed per minute and the compressor runs longer for the same result. In bad cases the coil ices over and cooling stops — our frozen coils guide covers that.
Do this first: is the filter the actual problem?
In the large majority of cases, yes.
The filter sits in front of the evaporator coil and catches most of what would otherwise settle on it. A clogged filter restricts airflow far more than a lightly dusty coil does — and it’s a five-minute job against an hour.
Clean the filter, run the unit, and see whether performance returns before going further. Our maintenance guide covers the routine, and our troubleshooting guide covers the other likely causes.
What you’ll need
- A vacuum cleaner with a soft brush attachment
- A soft brush — a clean paintbrush or a soft toothbrush
- A torch
- A cloth
- Your manual
- Optionally, a purpose-made coil cleaner if the manufacturer supplies or recommends one for your model
Not needed: a pressure washer, a garden hose, bleach, or anything you’d use on an oven. These damage fins and drive moisture into places it shouldn’t go.
The steps
1. Unplug it
At the wall. Leave it unplugged throughout.
2. Take it somewhere sensible
Outside or into a garage if you can, so dust and moisture aren’t going onto your carpet. Remember these weigh 25–35kg — our moving guide covers shifting one safely, and if you tilt it significantly you’ll need to stand it upright for several hours before switching on.
3. Remove and clean the filter
Vacuum or rinse depending on what the manual says — some filters shouldn’t get wet. Let it dry completely before refitting: hours, not minutes. A damp filter refitted is the main cause of a musty unit, as our smell guide covers.
4. Look at what you can actually see
With the filter out and a torch, look at the coil face. You’ll see closely spaced thin aluminium fins.
Assess honestly. A light grey film is normal and barely affects performance. A thick mat of dust and hair is worth removing. Visible mould means the drying routine matters more than the brushing.
5. Vacuum gently
Soft brush attachment, working in the direction of the fins — vertically, in line with them, never across. Let the vacuum do the work and don’t press.
6. Brush what the vacuum missed
A soft brush, dry, following the fin direction. Vacuum up what you loosen.
7. If you use a cleaner
Only a product intended for this, and only if your manual doesn’t prohibit it.
- Read the product instructions — some are no-rinse, some aren’t
- Apply to the coil face only, never toward the fan motor, control board or wiring
- Don’t saturate. Excess liquid has to drain somewhere
- Ventilate the room
- Wear gloves and eye protection if the product says to
If in doubt, don’t. Dry brushing and vacuuming carries no risk; liquid in an appliance does.
8. Check and clear the drain
While you’re here, check the drain port and tray aren’t blocked. A blocked drain causes leaks and nuisance shut-offs — our leaks guide covers it.
9. Wipe the accessible surfaces
A damp cloth around the intake and outlet grilles and the casing. Not soaking.
10. Let it dry, then run fan-only
Leave it to dry thoroughly — several hours if you’ve used any liquid. Then refit the dry filter, plug in, and run fan-only for an hour before cooling. That dries the internals and confirms the fan runs normally.
How often
- Filter: fortnightly during use, weekly with pets or in a dusty room
- Accessible coil face: once a season is plenty if the filter is kept clean
- Drain and tray: at the start and end of each season
- Full dry-out: two to four hours of fan-only before storage, every year, without exception
Our storage guide covers the end-of-season routine, which prevents most of the problems this article addresses.
When it needs an engineer instead
- The dirt is behind the casing where you can’t reach
- There’s visible mould you can’t get to
- The smell persists after cleaning and a full dry-out
- Performance hasn’t returned after a proper clean
- You can see damage, corrosion or oily residue on the coil — oily residue can indicate a refrigerant leak
If it’s in warranty, contact the manufacturer first — a self-attempted repair may void it. On an older budget unit, weigh a professional clean against replacement, and dispose of the old one properly: our disposal guide covers why it can’t go in a bin.
Frequently asked questions
Can I use a hose or pressure washer?
No. Portable units aren’t designed to be washed down, the fins flatten under pressure, and driving water into a mains appliance is dangerous. That advice usually comes from guides about fixed outdoor condenser units, which are a different thing entirely.
Will cleaning the coils restore lost performance?
Sometimes, but the filter, window kit sealing and hose are more often the cause. Work through our troubleshooting guide before assuming it’s the coil.
Can I use vinegar or washing-up liquid?
Check your manual — manufacturers vary on what’s acceptable, and some materials react badly. Dry cleaning is the safe default, and never introduce liquid into the body of the unit.
What if I’ve bent some fins?
Fin combs exist for fixed systems, but on a portable unit the coil is usually too enclosed to use one. Prevention is the realistic answer — go gently, and accept that a slightly dusty coil beats a flattened one.
Sources
- Electrical Safety First — Electrical safety around the home
- GOV.UK — Fluorinated gases (F-gases): rules
- BESA — Rise of propane sparks safety fears (R290 classification)
- NHS — Can damp and mould affect my health?
- HSE — Manual handling
Related reading: our maintenance guide and smell guide.
If cleaning hasn’t restored performance and the unit is past its useful life, compare current specifications at Amazon UK.