How to Store a Portable Air Conditioner Over Winter (UK)
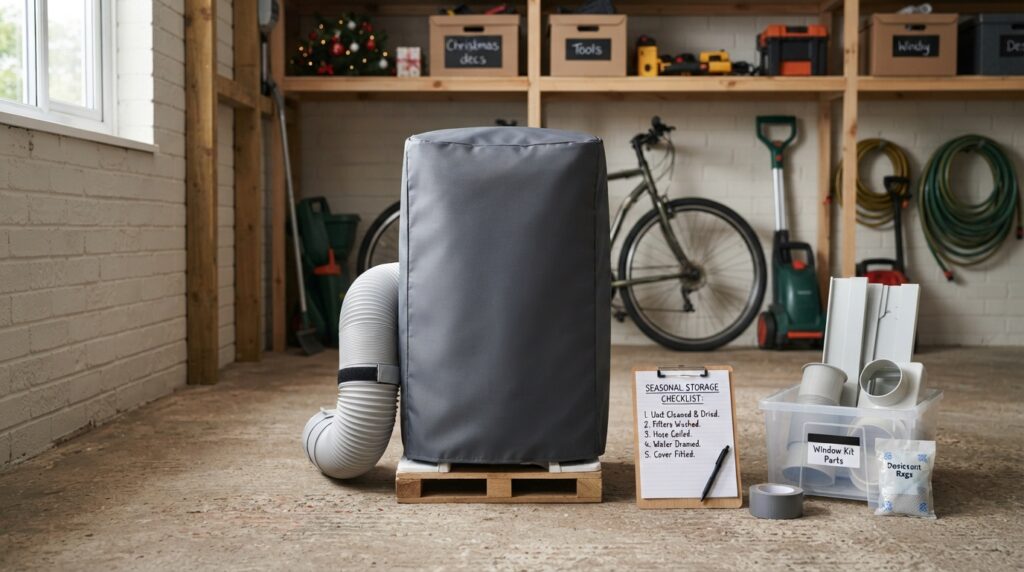
Don’t just wheel it into the shed and forget about it. Drain every last drop of water, then run the unit on fan-only for an hour or so to dry the internal coil completely — a damp coil left for months is exactly how mould and musty smells get started. Clean the filter, coil the exhaust hose loosely rather than kinking it, and store the whole thing somewhere dry and reasonably temperate — a spare room or dry loft beats a cold, damp garage or shed. Cover it to keep the dust out, and keep the manual and any window-kit parts with it so nothing goes missing before next summer.
Ten minutes now saves you a mouldy, musty or seized-up unit next June. Here’s the proper way to put a portable air conditioner away for the winter.
Step 1: drain it completely
Most portable units collect some condensate even in normal cooling mode, and dehumidifier mode collects a lot more. Empty the internal tank or bucket fully, following your model’s drain point (usually a bung or drain plug low on the back or base). If yours has a continuous-drain hose fitted, remove and drain that too. Any water left sitting inside over winter is a head start for mould and a source of a musty smell next summer.
Step 2: run it on fan-only to dry the coil out
This is the step most people skip, and it’s the one that matters most. The internal coil is wet with condensation after cooling, and switching the unit off with a damp coil sealed inside a cabinet for months is close to ideal conditions for mould and mildew. Instead, switch to fan-only mode (no cooling) for roughly an hour before you pack it away — this circulates dry air through the coil and dries it out properly, so nothing is left damp inside the casing.
Step 3: clean the filter and casing
Remove and clean the air filter (most are washable — check your manual) and let it dry fully before refitting or storing it separately in a bag. A dusty filter left for months collects more dust and can harbour mould too. Wipe down the outer casing while you’re at it, especially any vents where dust has built up over the summer.
Step 4: deal with the hose and window kit properly
- Coil the exhaust hose loosely rather than folding it sharply or leaving it kinked — a tight kink can crease and weaken the accordion-style hose material over a long storage period.
- Keep the window kit parts together with the unit — the brackets, foam seals and adaptor pieces are easy to lose separately, and a fiddly search for a missing window bracket is the last thing you want on the first hot day of next summer.
- Check the seals for any tears or gaps before storing, so you know if you need replacements before next season rather than finding out in a heatwave.
Step 5: choose the right storage spot
- Keep it upright — tipping a refrigerant-containing unit on its side can disturb the compressor oil; store it the way it normally stands.
- Cover it with a breathable dust sheet or the original packaging rather than a fully sealed plastic bag, which can trap any residual moisture inside rather than letting it escape.
- Don’t stack heavy items on top — the casing and internal fan housing aren’t designed to bear weight.
- Keep the manual with it, or take a photo of the model number and settings page, so you’re not hunting for instructions next summer.
Bringing it back out next summer
- Check the filter again — clean it even if you cleaned it before storage, since dust settles regardless.
- Inspect the hose and seals for any damage from storage before fitting the window kit.
- Run it for 20–30 minutes before you actually need it, so you catch any issues (unusual noise, no cooling, error codes) with time to sort them rather than on the first heatwave day. Our freezing-up guide and leaking-water guide cover the most common issues if something isn’t right.
- Wipe down the casing to clear any dust that settled over winter before it gets a proper first outing.
Frequently asked questions
Can I just switch it off and store it as-is?
You can, but you risk mould and a musty smell from residual moisture on the coil, plus water left in the tank. A quick drain and a fan-only drying run take under an hour and prevent both.
Is it OK to store a portable air conditioner in the garage?
It’s not ideal if the garage is cold and damp — moisture encourages mould and corrosion, and very low temperatures aren’t kind to the compressor oil. A dry spare room or landing cupboard is better if you have one; if the garage is your only option, keep it off the floor, away from damp walls, and covered.
Should I store it lying down to save space?
No — keep it upright. Tipping a refrigerant unit on its side can disturb the compressor oil. Store it standing the way it normally operates.
How long can a portable air conditioner sit unused?
Several months of proper off-season storage is completely normal and what these units are designed for. The steps above (drain, dry the coil, clean, store dry) are what keep a long stretch of disuse from causing problems.
Sources
- Energy Saving Trust — Keeping your home cool in summer
- Electrical Safety First — Electrical appliance safety and storage
Related reading: our freezing-up troubleshooting guide and full maintenance guide.
Window kit seals and spare hoses are cheap and worth having on hand before next summer. Compare current options at Amazon UK.